
Hey guys,
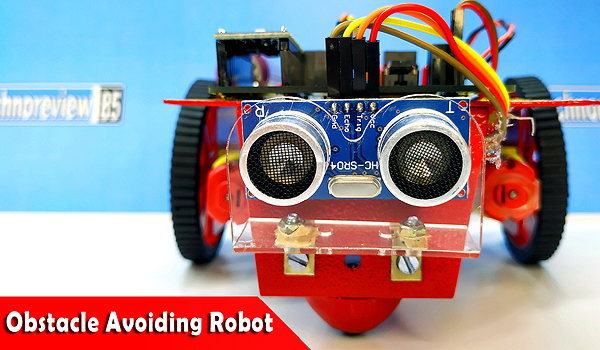
In this article, I am going to describe how you can make an obstacle avoiding robot using Arduino.
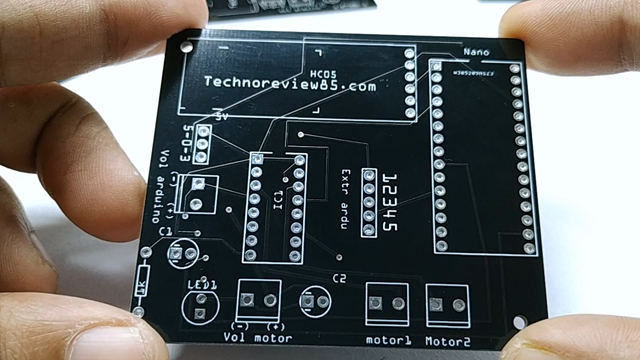
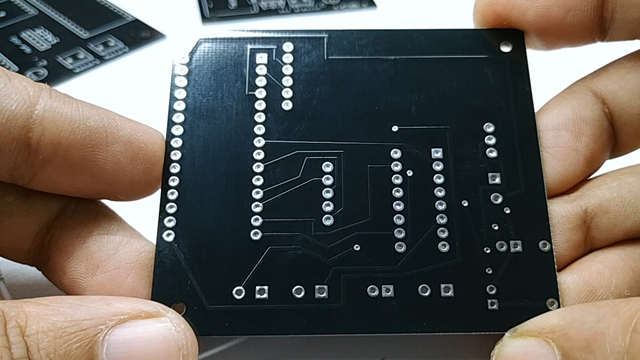
It is a popular Arduino robotic project. for avoiding a lot of wire connections, I have designed a PCB for it.
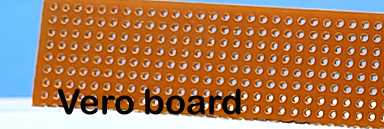
You can use a PCB or a dotted perfboard.
The PCB for this robotic project Is well designed & easy for making.You can make different types of Arduino robot using this PCB.
You need to make this project
| 2WD Robot chassis with castor wheel | |
| Robot wheel for BO motor | |
| 150 Rpm BO geared motor & 1.5 inch bolt & nut | |
| Ultrasonic sensor holder | |
| 2 pcs. 9V battery & battery connector | |
| L293D Ic & 16 pins Ic base | |
| 100mfd/25v capacitor 2 pcs | |
| 1K resistor & Led | |
| Header pins, jumper wire ( male to female) | |
| terminal block 4pcs | |
| HC-SR 04 ultrasonic sensor | |
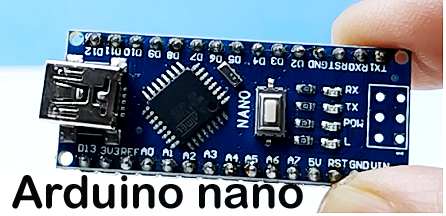
| Arduino nano | |
| Perfboard or PCB |
How it works
The ultrasonic sonic sensor detecting objects in front of it & measure the distance of the object.
In normal condition when there is no obstacle in front of the robot,
Two motors are rotating clockwise & the robot goes straight forward.
If any object was detected within 20 cm by the ultrasonic sensor then the left motor will start to rotate anti-clockwise
& right motor will rotate clockwise as it was.
So the robot turn left quickly if there is an object in front of it.
Circuit & connections if you are using a perfboard
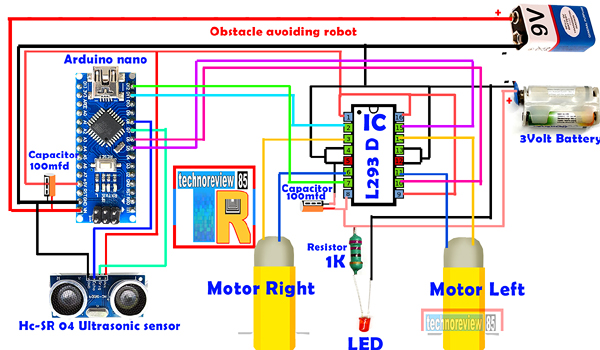
Here I used an Arduino nano & L293D dual motor driver.
Two capacitors as a filter. Led & 1k resistor for indication
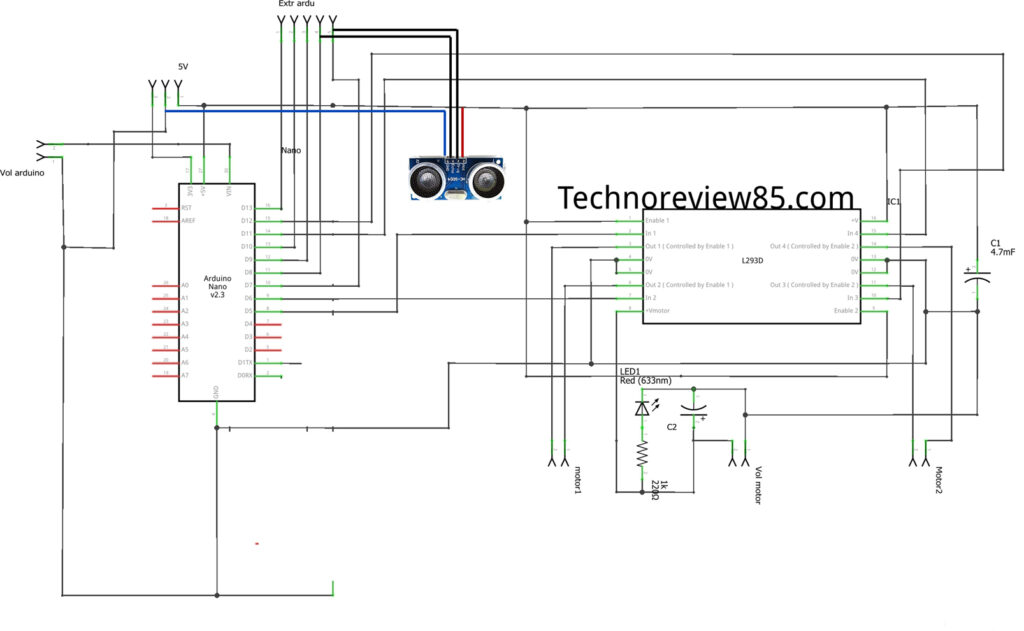

Arduino digital pin 7 connect to the ultrasonic sensor trigger pin
Arduino digital pin 8 connect to the ultrasonic sensor Echo pin
Arduino digital pin 5 & 6 connect to Ic l293d pin 10 & 15 for the left motor control
Arduino digital pin 11 & 12
Connect to ic l293d pin 2 & 7 for the right motor control
Connect left motor to ic l293d pin 11&14
Connect the right motor to ic l293d Pin 3 & 6
Connection of obstacle avoiding robot
Making with the PCB
The PCB for this robotic project Is well designed & easy for making. You can make different types of Arduino robot using this PCB.
Download & order Gerber file for PCB from here

Coding for this project
we have to upload code to arduino nano using arduino IDE
Download code from below
I have used a 9v battery for Arduino & another 9v battery for motor power.
For powering the motor it is good to use a rechargeable battery otherwise the 9 v battery can’t run the robot long time.
1 Comment