
In this article, I will tell you the easiest way to decode any IR remote control using an Arduino UNO board.
You can easily decode any Ir remote Key value in Hex code or decimal code just by following a few steps below.
Every remote has a different hex value for keys on a single remote.
So I will decode a key of a remote and then test it, it is working or not.
Just follow the steps all the necessary file links are in this post with a video tutorial.
You need to decode IR remote
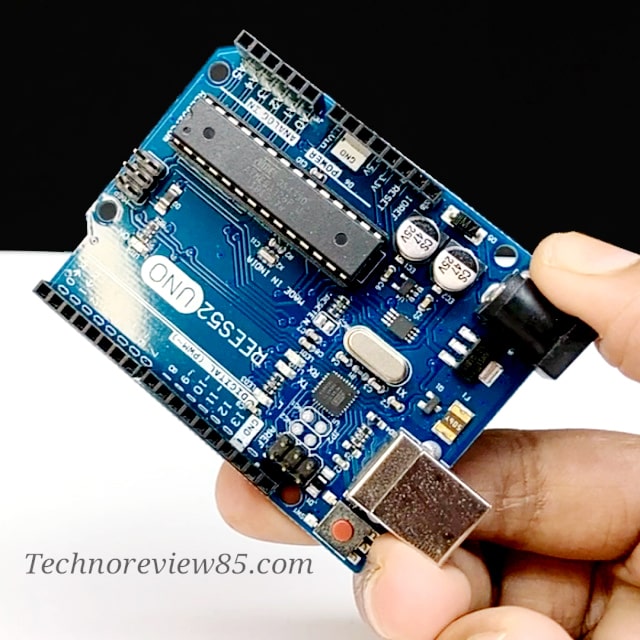
- Arduino Uno board
- TSOP 1738 ( You can use any other IR receiver but the pin connection may be a different show for the other sensor please check the pin out before the connection.
- LED
- Male-to-male jumper wires
- Breadboard
- Data cable for Arduino
- You need Arduino ide software on your PC.
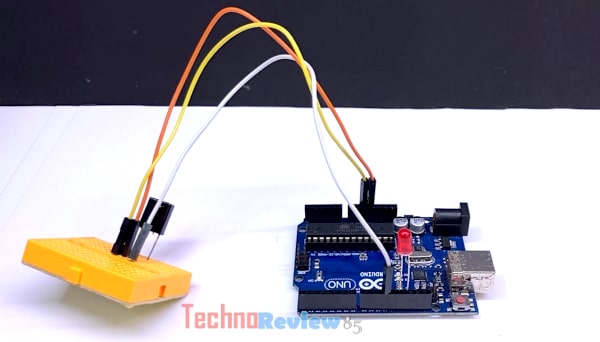
Connection of IR receiver for decoding ir signals
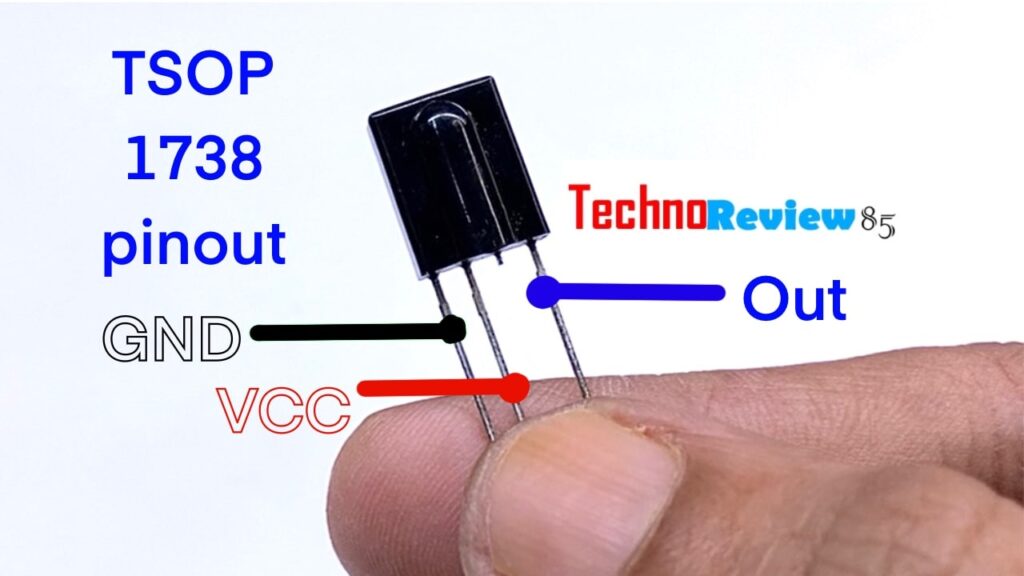
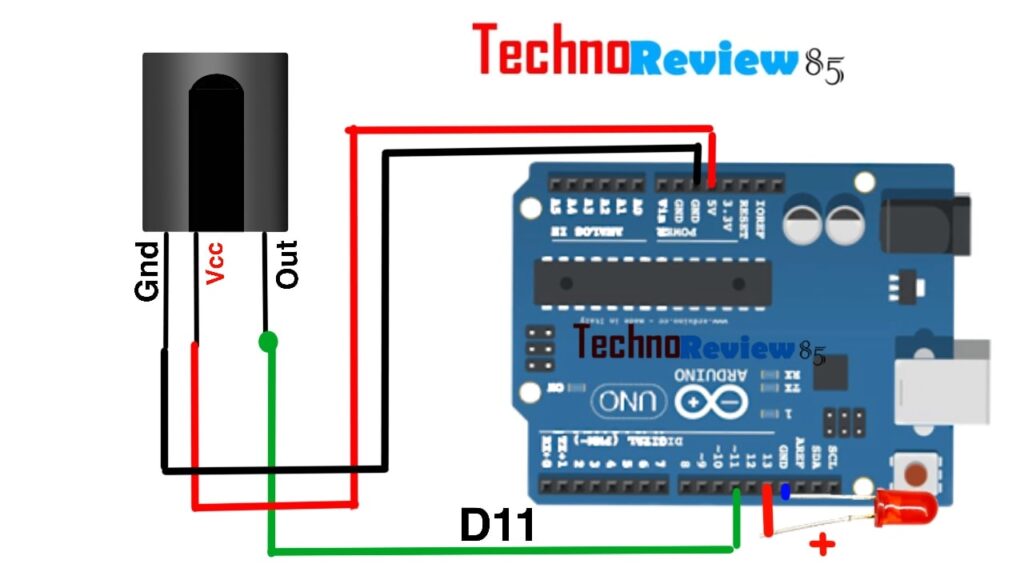
Insert IR receiver into the breadboard. Connect the first pin
Connect it to the Arduino GND.
Now connect the second pin and connect it to the Arduino 5v
Connect the third pin. Connect it to digital pin 11.
Connect LED positive to D13 and LED negative to GND.
The LED is just for testing no need every time.
Now the connection is done.
VIDEO Tutorial
ON Computer
Now go to your pc & make sure you have installed Arduino IDE software.
Download IR remote Library for Arduino IDE IRremote.rar file from
Extract the IR remote .rar
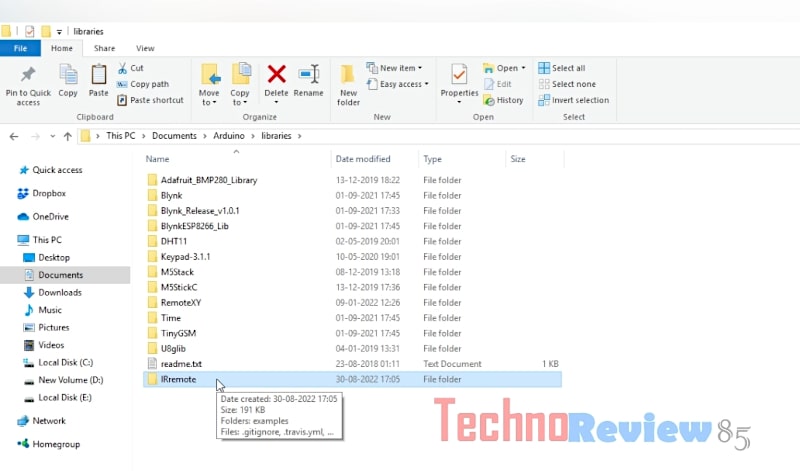
Copy the IRremote folder. Go to your PC – Documents – Arduino – libraries –
Now paste the IR remote folder inside the libraries folder.
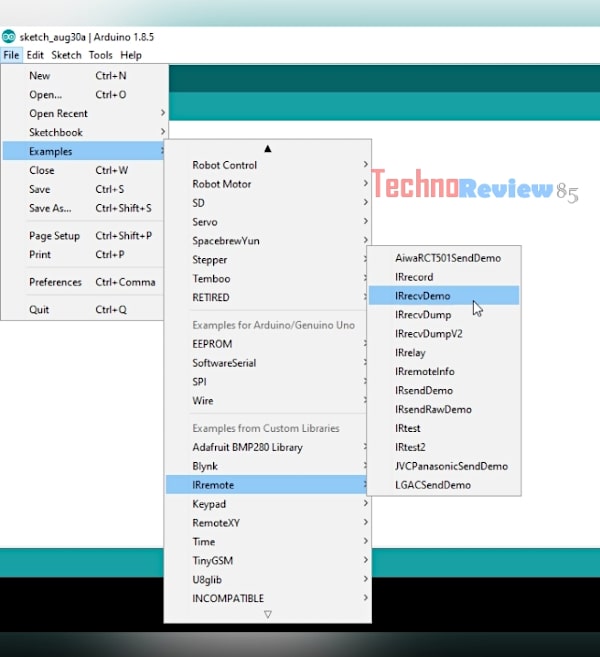
Now open Arduino IDE software
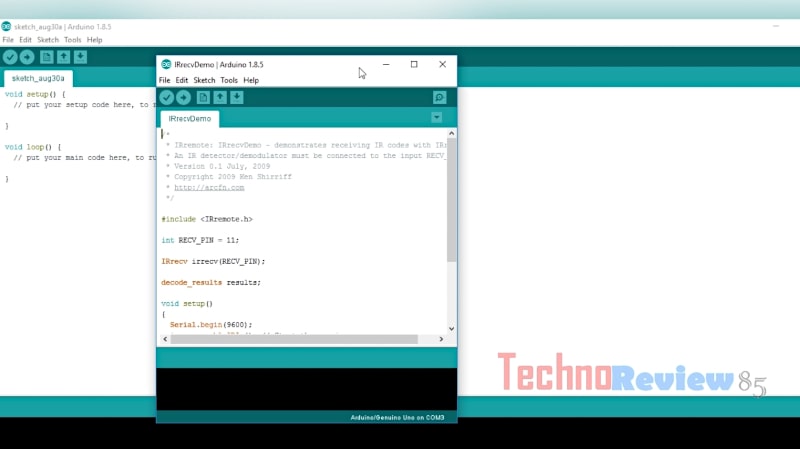
Go to file – example – Ir remote – Ir receivDemo code. This code will give you HEX value of Remote
IR receiv demo code is now opened on Arduino IDE.
Go to tools – check board Arduino UNO and select the proper com port.
Now upload the IRreciv Demo code to the Arduino.
Wait till the Uploading is done..
Decoding ir signals
Open serial monitor.
Press any key on your IR remote that you want to decode. On the serial monitor, you can see some codes.
Press repeatedly the button which you have pressed to confirm the HEX code of the particular key.
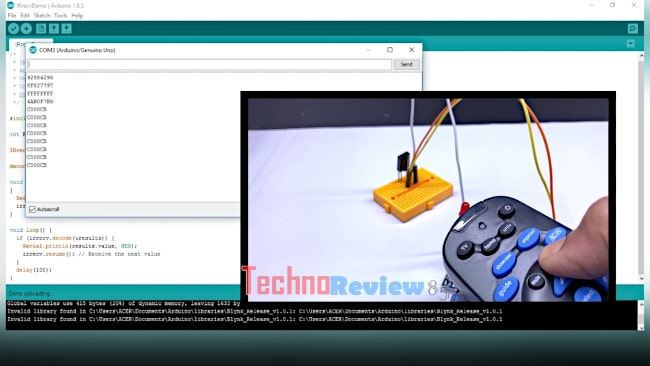
After getting the hex code copy it.
You can use Ctrl+C to copy from the serial monitor.
Paste it on a plain text file for saving. Your remote’s key is decoded.
Now I’m going to test the decoded code.
Download the testing code from here.
Copy it. Go to Arduino Ide.
Create a new file – select all and delete – now paste here testing code.
Now you have to change with your remote hex code. Wach video for beter under standing.
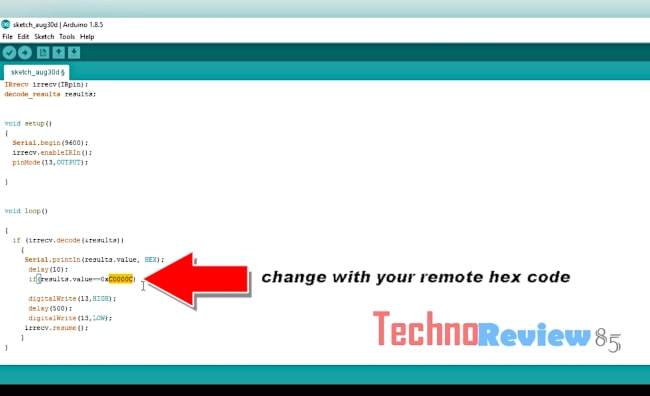
You have to use your remote hex code which you have decoded
Now upload the test code to Arduino Uno.
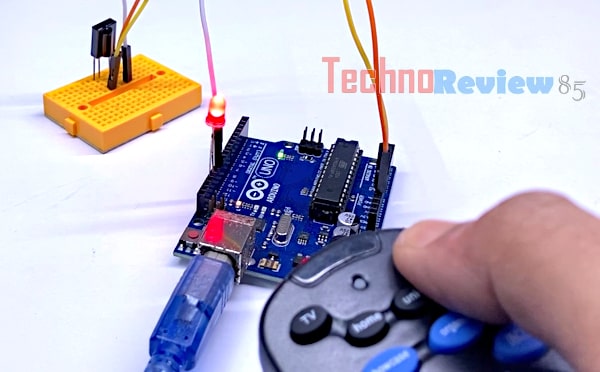
Here on Arduino you can see,
When I am pressing the power key the led is glowing but any other keys are not working.
On the serial monitor also you can see the values of the keys.
Now you can decode any IR remote hex value but in some of our projects, we need decimal values.
You can convert hex numbers to decimal numbers
Or
Download this code from here to get values in decimal numbers & upload this code to Arduino, it will give you the decimal value of the keys.
All connections are the same as the previous one.
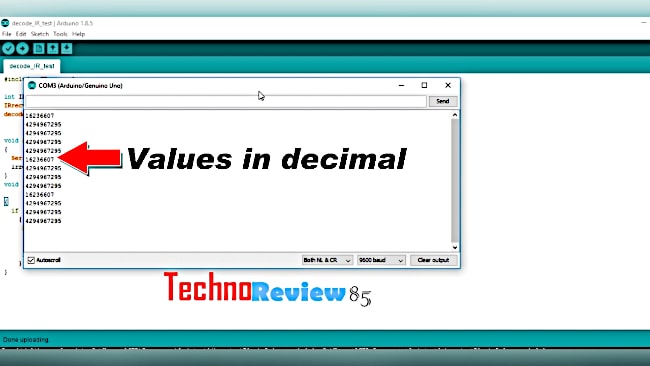
Here you can see it is showing values of keys in decimal numbers.
If you have any quarry regarding this topic feel free to contact me using comments on this post or for a quick response leave a comment on my Youtube video.