Last Updated on July 2, 2022 by technoreview85
Did you decide to make an Arduino robot but worry about a lot of
wire Connections?…. Then keep reading this post. I am going to describe, how to make an easy Arduino robot without messy wire connections.
You need to make
- Arduino nano
- L293 D ic, ic base
- Capacitor – 100mf/25 v – 2pcs
- Male, female header pin
- Terminal block- 4 pcs
- Led & 1k resistor
- Hc 05 Bluetooth module
- 9 volt battery or power bank
- Any 2wd robot chassis with two 150rpm geared motor
- PCB
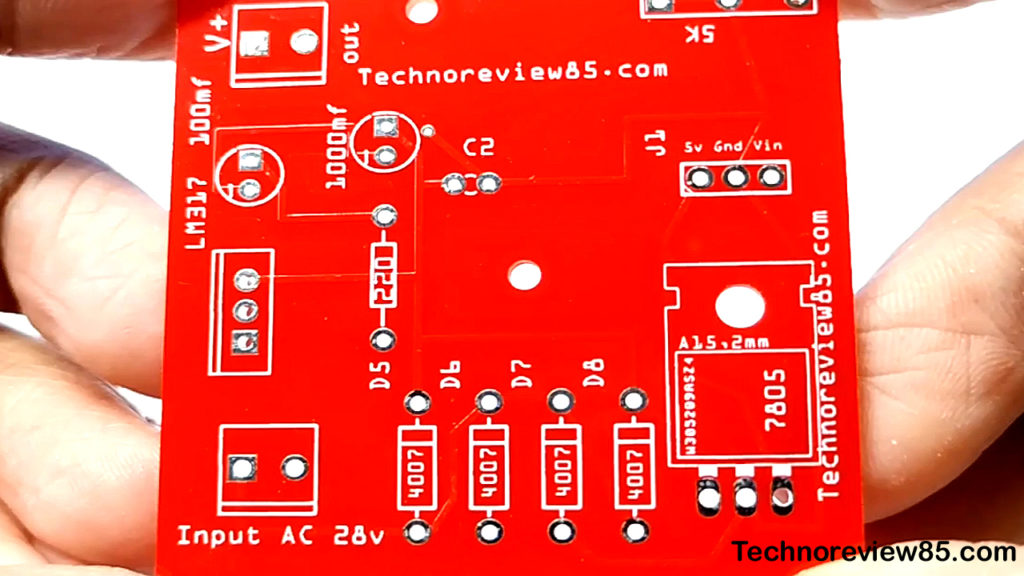
How to get PCB For this project, I have designed a circuit & make it into a PCB. You can download the PCB Gerber file from here. Then upload the Gerber file to pcbway.com

Pcbway is a world-leading PCB manufacturing company & they provide excellent quality PCB at a reasonable price. the 10 PCBs cost only 5$ (without shipping charge )
For order PCB just go to www.pcbway.com
Upload Gerber file which you have downloaded.
You can check your PCB price using Instant Quote. If you want to order then you have to create an account in pcbway & log in to your account. fill your address in your account then set some parameters like size, silkscreen colour etc. select shipping currier & place order.
Here are details about how to place an order in PCBWAY
Pcbway makes PCB quickly ( Build time 24 hours for 2 layer PCB) so you will get it soon depending on your Courier selection.


Assembling of components
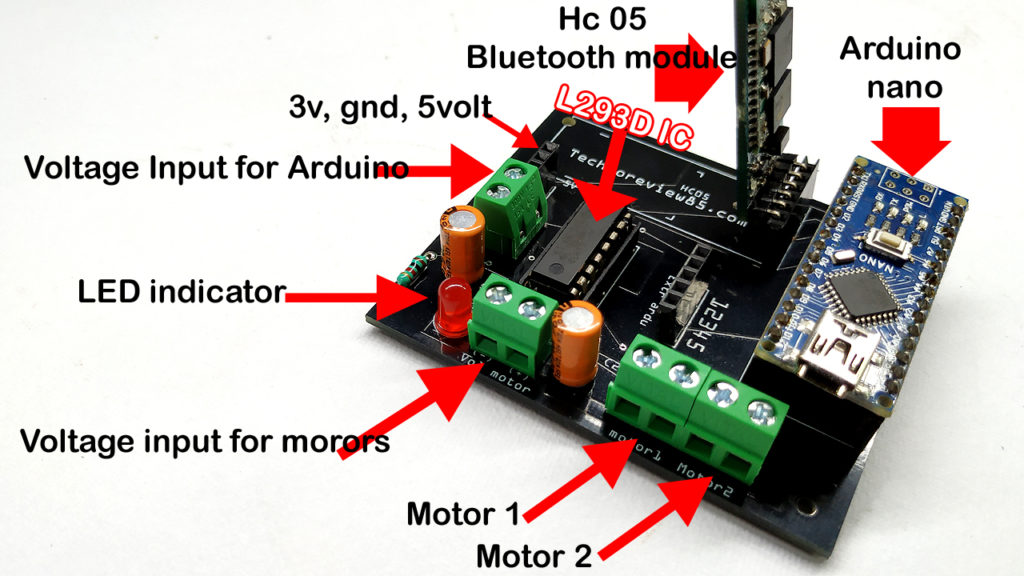
The assembling of components is very easy. All components value, and polarity is printed on the PCB so just follow the printed components on the PCB.I have used female header pins for Arduino nano & 16pin IC base for L293 D IC.

Connection to motors & power
The green terminal block is for motors & power connections. here I am using two 9 volt batteries one for Arduino & another for motor. after connecting the batteries the red LED will glow as a power indicator.
The motor 1 & motor 2 will be connected to the left & right motor

This board has dual motor driver & some extra Arduino pins, 3V,5V,GND out so Using this PCB you can make line follower, obstacle avoider, edge finder, voice control & other Arduino robots by changing Arduino code. In this post, I am describing how to make Bluetooth control Arduino robot or car.
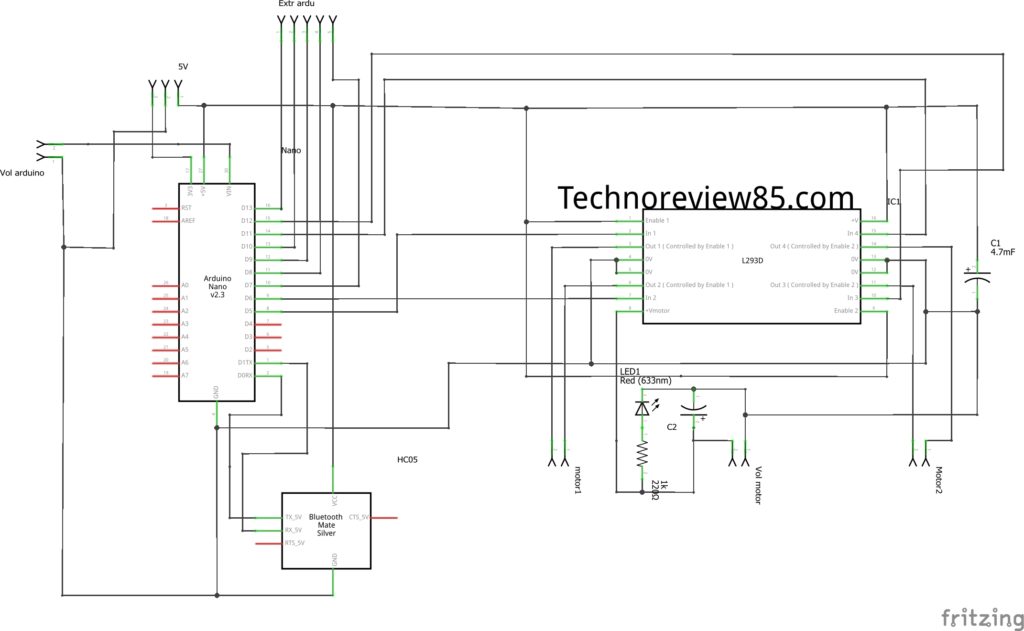
Schematic of this project

Upload the code to Arduino nano
Download Arduino code for Bluetooth control robot car from here
open the downloaded code with Arduino IDE software & upload it to your Arduino nano.
OR copy the code bellow
and paste to Arduino IDE then upload to Arduino nano
/*ANDROID ARDUINO BLUETOOTH RC CAR  */


int led = 3;        //led

int outPin1 = 5;     //motor1
int outPin2 = 6;    //motor1

int outPin4 = 11;   //motor2
int outPin3 = 12;   //motor2

char bt = 0;       //BT
/*-----------------------------------------------------------------------------------------------------*/

void setup()
{
  Serial.begin(9600);

  pinMode(outPin1,OUTPUT);
  pinMode(outPin2,OUTPUT);
  pinMode(outPin3,OUTPUT);
  pinMode(outPin4,OUTPUT);

  pinMode(led,OUTPUT);
}
void loop()
{
  if (Serial.available() > 0)
  {
    bt = Serial.read();
    digitalWrite(led, 1);
    /*_________________________________________________________________________________________________*/

    if(bt == 'F')        //move forwards
    {
      digitalWrite(outPin1,HIGH);
      digitalWrite(outPin2,LOW);
      digitalWrite(outPin3,HIGH);
      digitalWrite(outPin4,LOW);
    }
    else if (bt == 'B')       //move backwards
    {
      digitalWrite(outPin1,LOW);
      digitalWrite(outPin2,HIGH);
      digitalWrite(outPin3,LOW);
      digitalWrite(outPin4,HIGH);
    }
    else if (bt == 'S')     //stop!!
    {
      digitalWrite(outPin1,LOW);
      digitalWrite(outPin2,LOW);
      digitalWrite(outPin3,LOW);
      digitalWrite(outPin4,LOW);
    }
    else if (bt == 'R')    //right
    {
      digitalWrite(outPin1,HIGH);
      digitalWrite(outPin2,LOW);
      digitalWrite(outPin3,LOW);
      digitalWrite(outPin4,LOW);
    }
    else if (bt == 'L')     //left
    {
      digitalWrite(outPin1,LOW);
      digitalWrite(outPin2,LOW);
      digitalWrite(outPin3,HIGH);
      digitalWrite(outPin4,LOW);
    }
    else if (bt == 'I')    //forward right
    {
      digitalWrite(outPin1,HIGH);
      digitalWrite(outPin2,LOW);
      digitalWrite(outPin3,LOW);
      digitalWrite(outPin4,HIGH);
    }
    else if (bt == 'G')    //forward left
    {
      digitalWrite(outPin1,LOW);
      digitalWrite(outPin2,HIGH);
      digitalWrite(outPin3,HIGH);
      digitalWrite(outPin4,LOW);
    }


    }

  }
  /*---------------- E N  D -----------------------------------------------------------------------*/
Download Bluetooth RC controller from play store
I am using Arduino Bluetooth car controller app Bluetooth RC controller
from play store but
you can use any Bluetooth controller app but need some changes in Arduino code.

Pretty! This has been an extremely wonderful post. Many
thanks for supplying this info.
Heya i’m for the first time here. I found this board and I find It really useful & it helped me out a
lot. I hope to give something back and help others like you aided me.
Hey there! I simply want to give you a huge thumbs up for
the excellent info you have right here on this post. I am coming back to your web site for more soon.
I constantly spent my half an hour to read this blog’s articles or reviews all the time
along with a cup of coffee.
What’s up mates, its impressive paragraph regarding teachingand entirely defined, keep
it up all the time.
Hello, I enjoy reading through your post. I like
to write a little comment to support you.
Great post.