Last Updated on June 26, 2024 by technoreview85
This is a complete step-by-step guide to making an electric timer plug. This timer Ac socket can turn on or off any Ac electrical appliance. We can set the time using a potentiometer. This is a simple circuit without an Arduino or any other microcontroller so no need to program or code.
It is useful for pumps, motors & other household or industrial Ac electrical appliances. Here I have used a 6 amp relay if you want to use a heavy pump, electric geyser, etc. Then you have to use a 16 amp relay. Other components will be the same as described in this article.
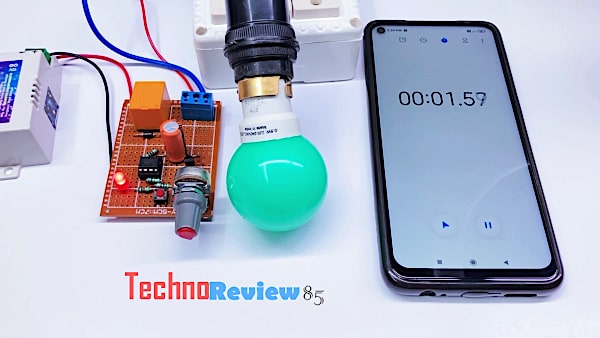
This is an electrical outlet timer using the popular timer IC 555
How does timer plug work & uses for
This timer plug can be used for several purposes like –
- Outlet timer
- Timer plug for Christmas lights
- Timer plugs for lights
- Timer for water pump
- Timer for a geyser
- As an Industrial timer
It is an adjustable timer. You can adjust the time duration between 1 second to 10 minutes.
You need to make this plug with a timer

- 12-volt Relay
- 470 K potentiometer
- Tactile switch
- IC 555 & 8-pin IC Base
- Diode IN4007
- Resistor 1K – 3 pcs
- Resistor 10K
- Transistor BC 548 B
- Dotted perfboard size 5X7 cm
- 3 pin terminal block
- 12 Volt Ac to Dc power supply
- Some wire
- An Ac socket

Project video
Circuit diagram
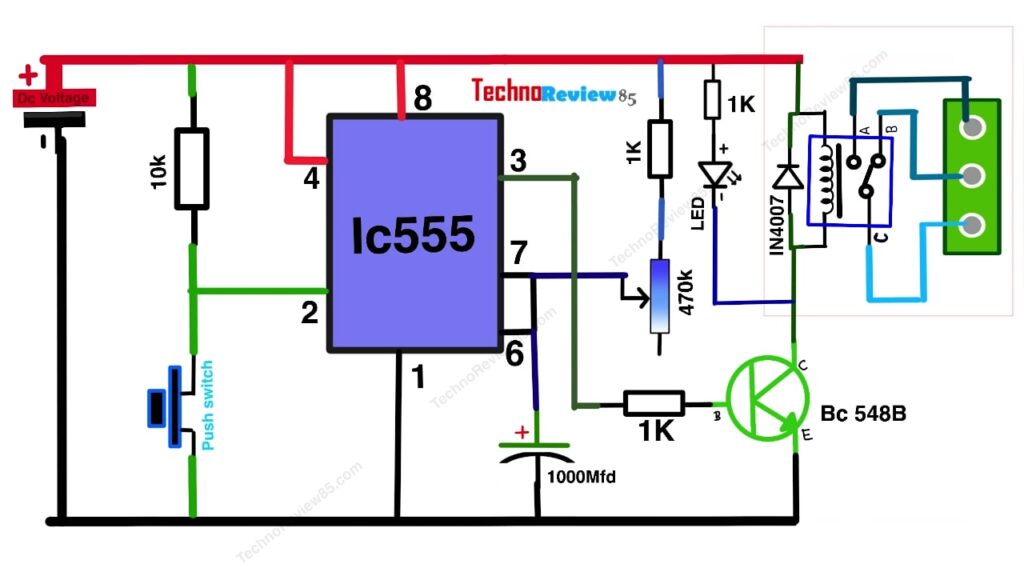
Connect all components according to the circuit diagram.
Connection with Ac the socket & main line
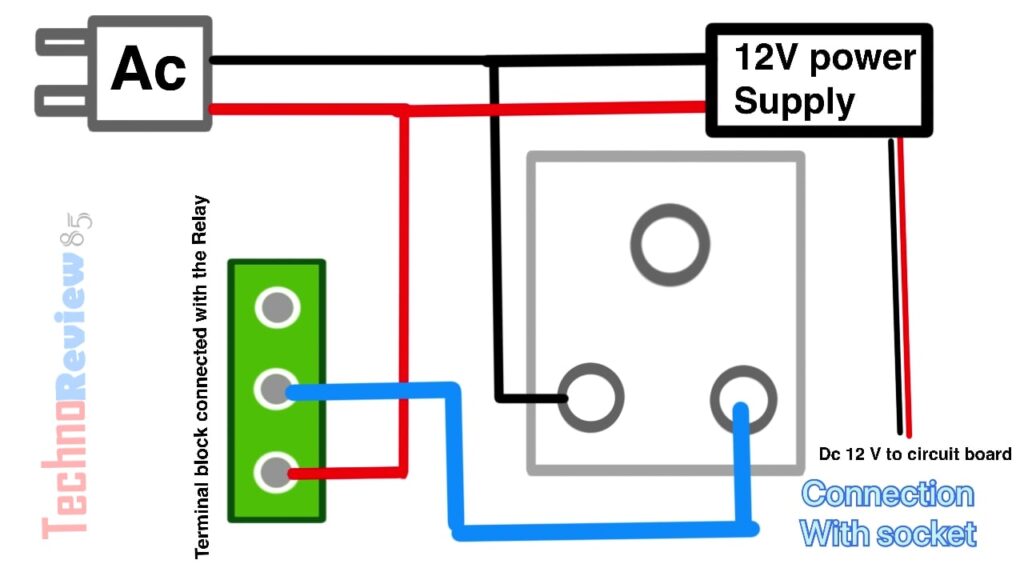
Ac electric warning
We are using Ac main line. If you don’t know about AC electrical wiring please take help of a professional person. Don’t touch the relay & other components when AC is connected.
I have used 12v DC to run the electronic circuit. The Ac is connected to the relay. I have used a 3-pin terminal block for easy connection.
You can adjust the delay time using this potentiometer.
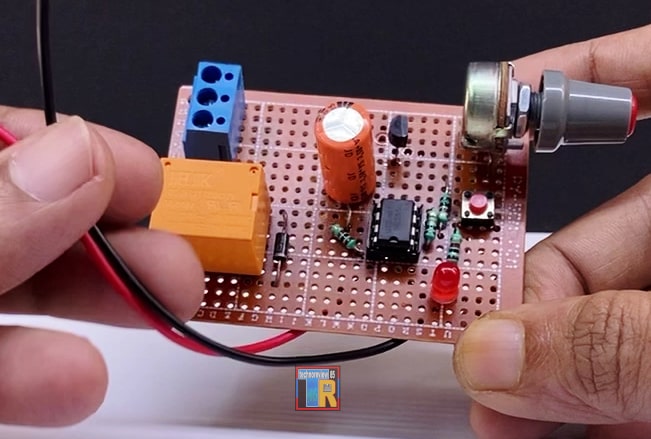
You can adjust the perfect time which you need. You have to set the potentiometer value by monitoring with a multimeter.
For example:-
Keep value to 47K ohm for 1 minute.
23.5k for 30 sec etc.
You can use a normal fixed resistor if you need a fixed time.
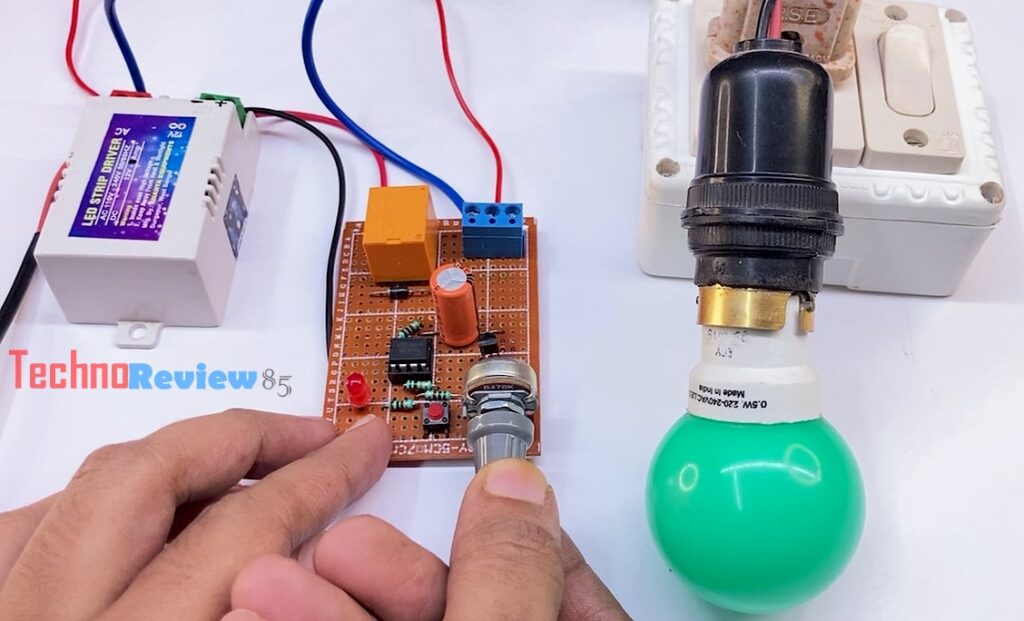
Now you have to connect AC socket to the terminal block & connect to the Ac main line.
You can use it as an on-timer by changing the connection on the relay.
You have to press the micro tactile switch which is connected to the IC pin 2 to start the timer.
Instead of the micro switch, I can use some sensor module to trigger this circuit.
Make the circuit on a breadboard before making it on a perfboard.
For a better understanding, you can watch the project video. If you have any questions feel free to contact me in the comments. For a quick response, you can also comment on my YouTube video.
