
In this article, I am going to share a very interesting project using an esp32 cam module.
It is a surveillance robotic car.
You can control this robot using your smartphone or computer using a WiFi network.
This is an Esp32 camera project so we can watch the live-streaming video from the Esp32 cam module.
To operate this surveillance robot you have to use any web browser. Your smartphone & the ESP32 cam module must have at the same wi-fi network.
I am using the Arduino IDE for programming the Esp32 cam. Esp32 pin connection & Arduino code for surveillance robots is included in this article.

You need to make an Esp32 cam Surveillance Robot
- 150Rpm motor 4pcs
- 65 mm robot wheels 4pcs
- A 4×6 inch plywood or 4WD car chassis (Buy) affiliated
- L293d motor driver board
- 2 pcs 3.7v lithium-ion batteries with battery holder.
- Step down dc to dc buck converter module. (Set output voltage at 5V)
- Esp32 camera module (Buy) affiliated.
- Some jumper wires.
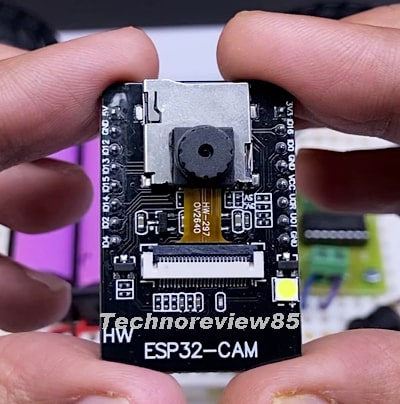
ESP 32 cam module hasn’t any onboard programmer chip so we need an external programming set-up.
To program ESP32 cam module you need a USB to TTL converter or
You can program ESP32 cam using an Arduino UNO board. Here is a detail about how to program ESP32 cam using Arduino UNO
You need to program Esp32 cam
- USB to TTL converter (Buy) Affiliated or FTDI programmer
- Mini breadboard
- Jumper wire
And
Add Esp32 board for Arduino IDE ( board manager URL is given in this article)
Arduino code for surveillance Robot (Download)
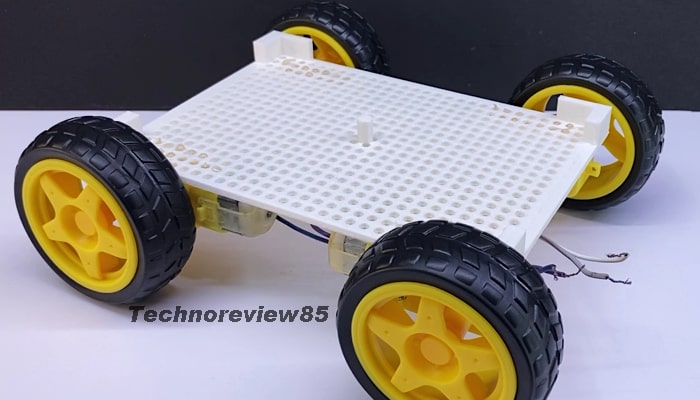
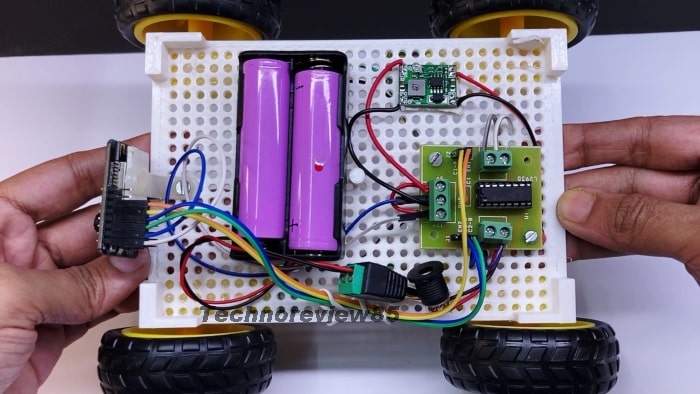
Prepare a 4WD Robot
You have to prepare a 4wd robot. You can use any 4WD robot chassis or you can build it on plywood.
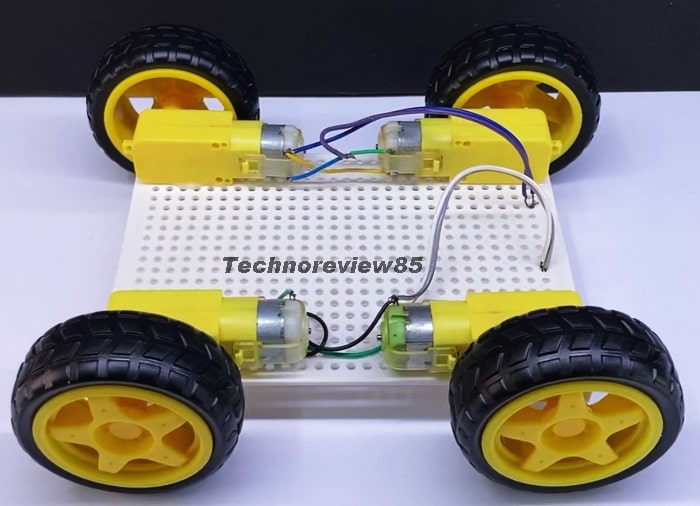
I have used my 3D-printed project build plate.
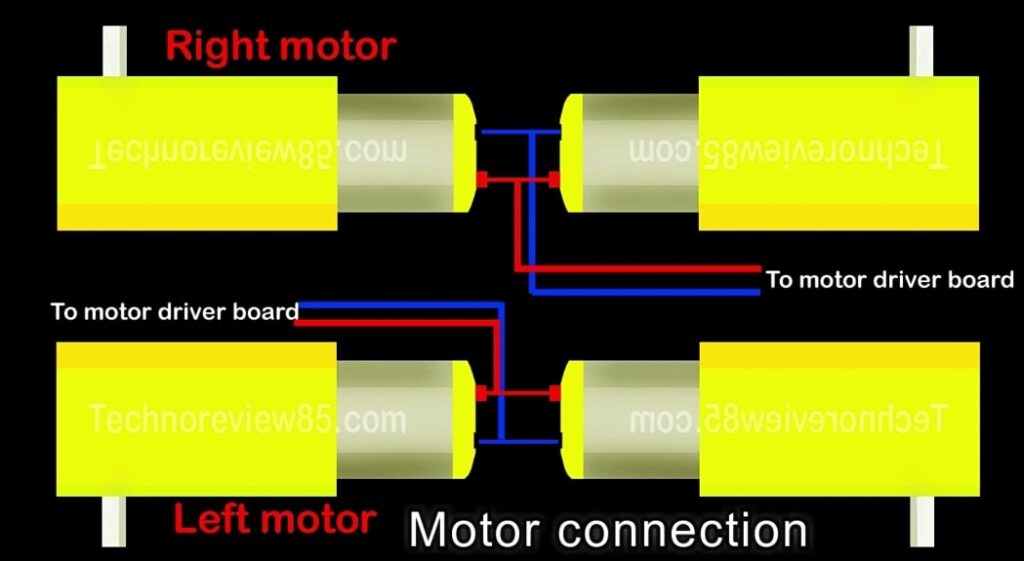
Connect 4 motors like this picture
Before connecting with the ESP32 cam module you have to program it.
I have a dedicated video tutorial article & video about ESP 32 cam module programming. You can check it from here if you are new to ESP 32.
Anyway, I am telling you the programming process quickly.
Connection for programming ESP32 cam
For programming the esp32 cam we need a USB to TTL programmer & a breadboard.
Gpio 0 of ESP 32 cam should be connected to the gnd to active programming mode.
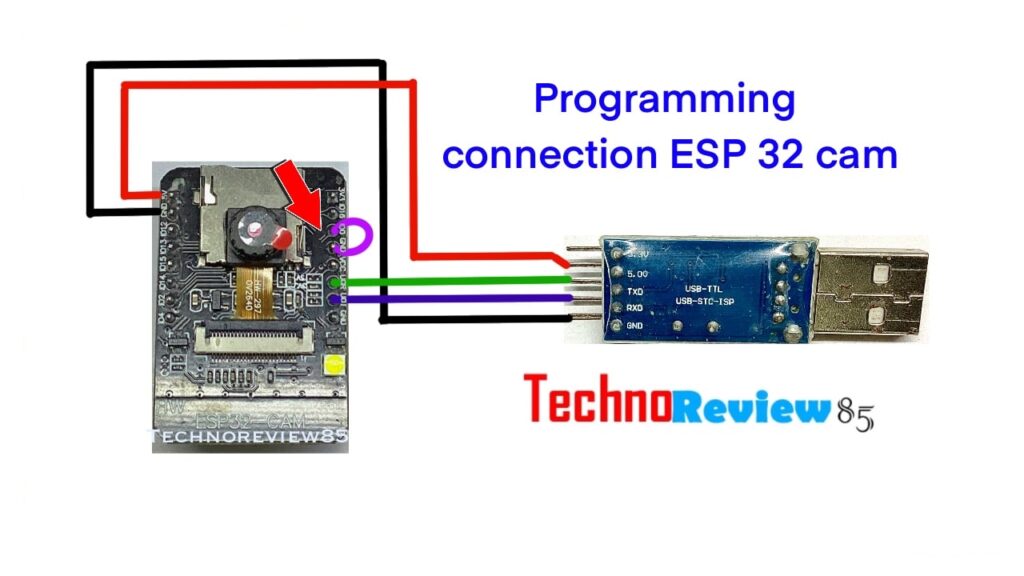
The above picture shows the programming connection
Esp 32 camera module Programming connection

USB TTL – TX to ESP32 cam RX
RX to ESP32 cam TX
5V to ESP32 cam 5V
Gnd to Gnd
If you use an Arduino UNO instead of USB to TTL, the connection will be different. check here
ESP32 cam module programming with Arduino Ide
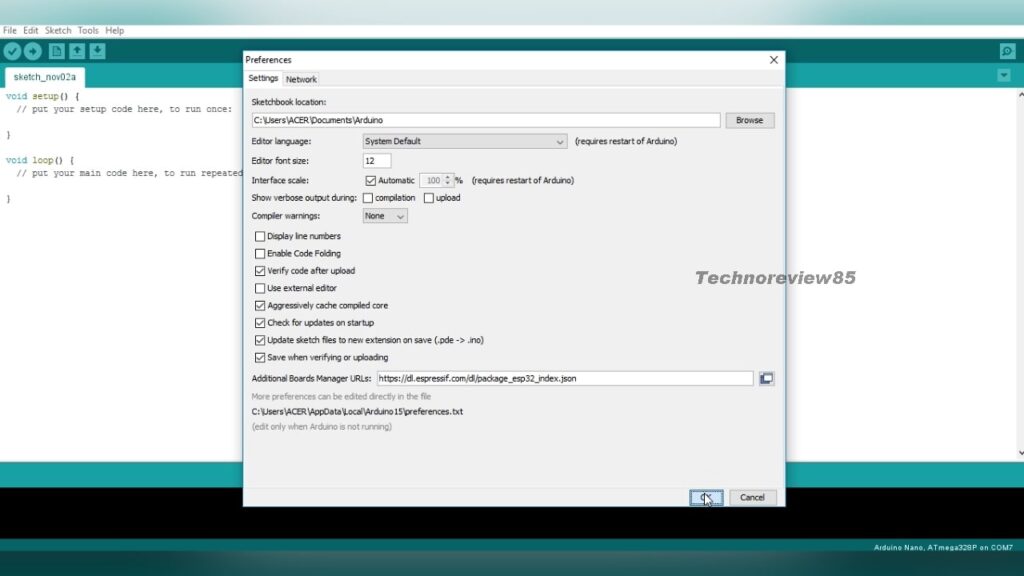
Open Arduino Ide – go to file – preferences – here paste- board manager URL
Board manager URL
https://dl.espressif.com/dl/package_esp32_index.json
Click ok.
Go to tools – board manager here type Esp32 install esp32 board support I have already installed.
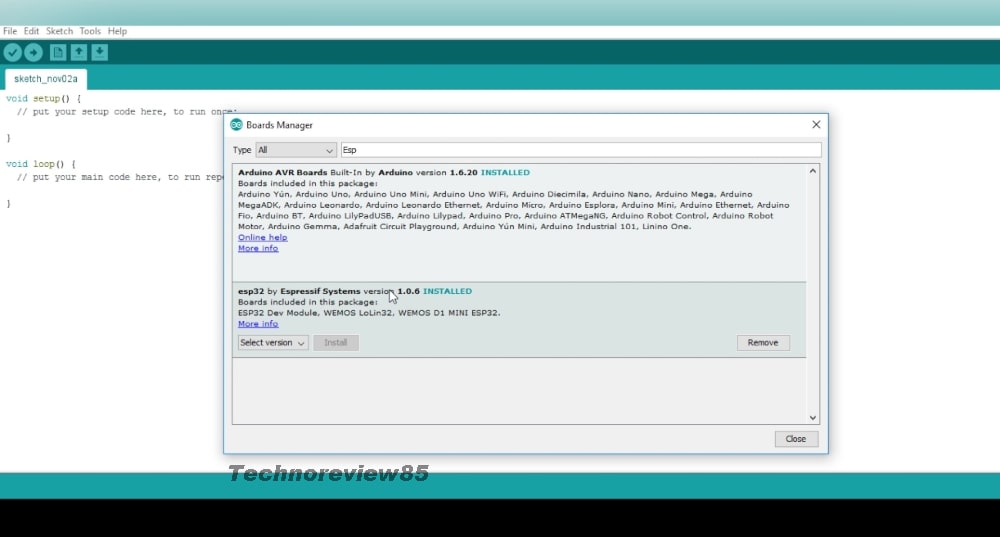
Close it
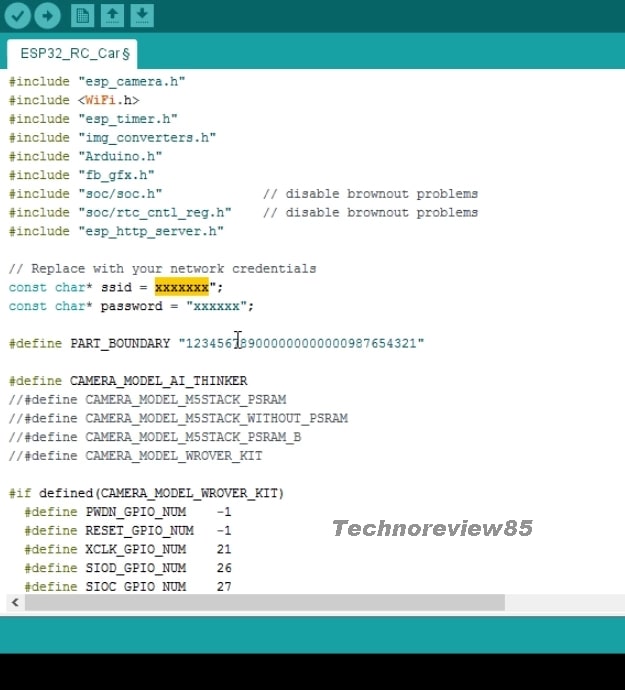
Now open the Rc car code
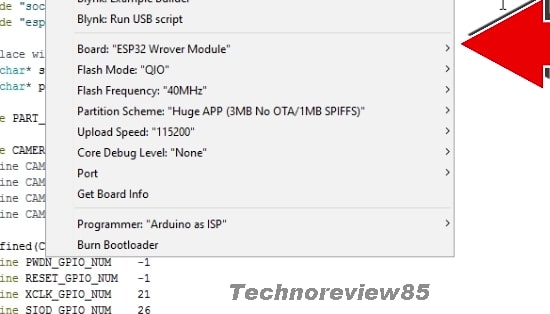
Go to – tools – select board – esp32 wrover module
Select all programming parameters as the same as the following image.
Now connect your esp32 cam board to the computer. I’m using an USB to TTL converter for programming.
Gpio 0 must be connected to gnd.
You have to put your wifi router SSID & password on the Arduino code.
Select your com port & click on upload.
Sometimes you need to press the reset button when it shows connecting…
The code is uploaded now remove the jumper wire from gpio 0
Open serial monitor on Arduino ide
& Press the reset button on the cam board.
Now the cam board is connected successfully to my wifi router.

Here showing an IP address – copy it & note it down.
You can check it –
Go to any web browser & paste the copied IP.

Video tutorial for this project
Now my esp 32 cam is ready for work.
I have to connect it to the power & motor driver board.
Connection diagram of an ESP32 surveillance Robot
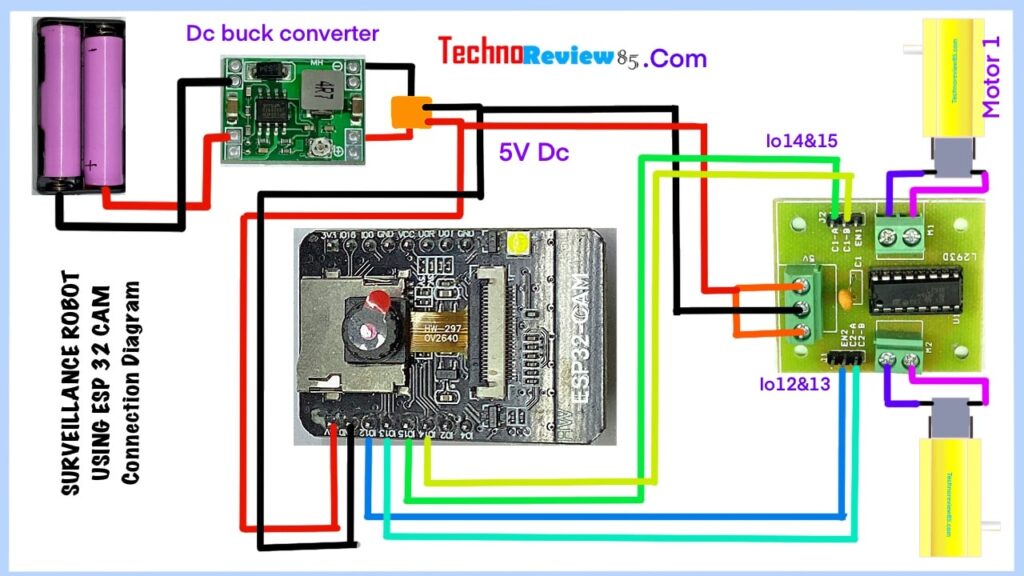
Here is the Connection diagram.
connect ESP32 cam, L293D motor driver board & power.
For power, I have used 2 lithium batteries which is 7.4Volt on the series connection & then I have used a dc buck converter.
The circuit runs on 5V so you can use also a power bank.
How to use
Just open a web browser & type the IP.
You can watch the live video streaming from the esp32 cam & control motors.
Disclosure: I get commissions for purchases made through links in this post
Feel free to write me if you have any problems or queries about this project. for a quick response comment on my youtube video.