
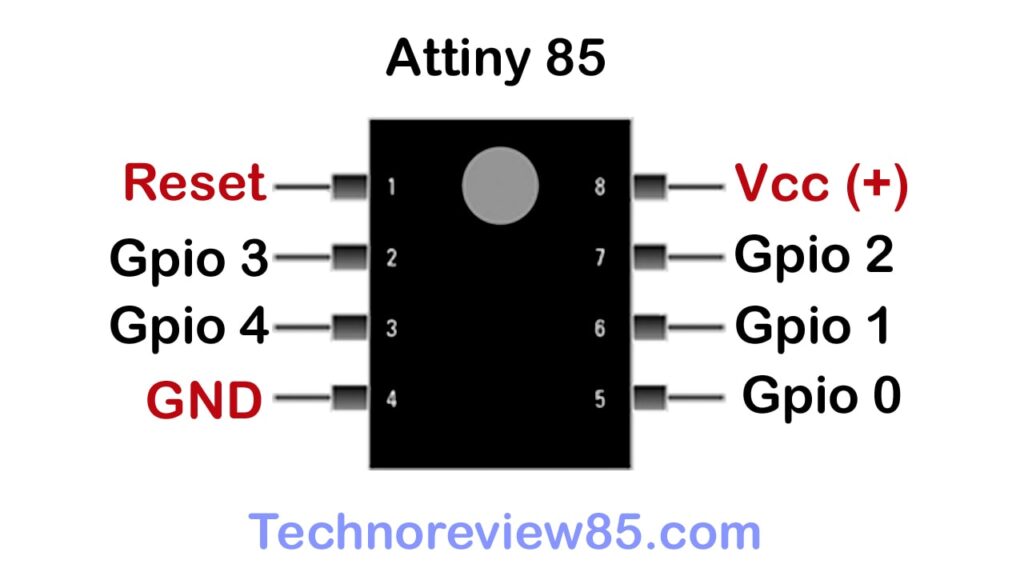
Attiny 85 is an 8 pin microcontroller. You can use it for making different types of projects. It is smaller than an Arduino so we can use it in our small projects instead of an Arduino.
In this article, I will tell you how you can program this Attiny85 8 pin avr based microcontroller using Arduino Uno board & Arduino ide software. For this method no need FTDI programmer.
I am going to describe, how to burn the boot loader & upload a sample Led blink code.
Set up Arduino Uno for programming
(Arduino as Isp)
Connect Arduino Uno to a computer.
Go to tools – select board, Arduino Uno.
Select your comport.
Now go to – file- example -Arduino Isp
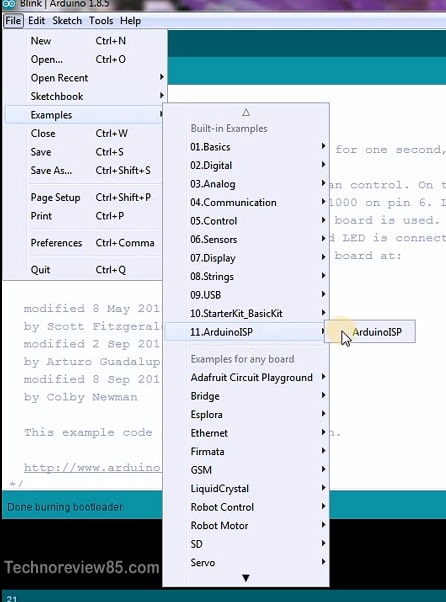

Upload this Arduino Isp code to Arduino Uno.
How to connect Attiny85 to Arduino Uno for programming
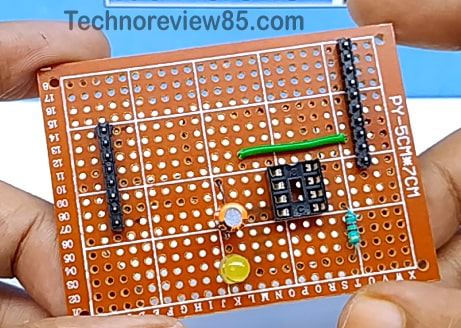
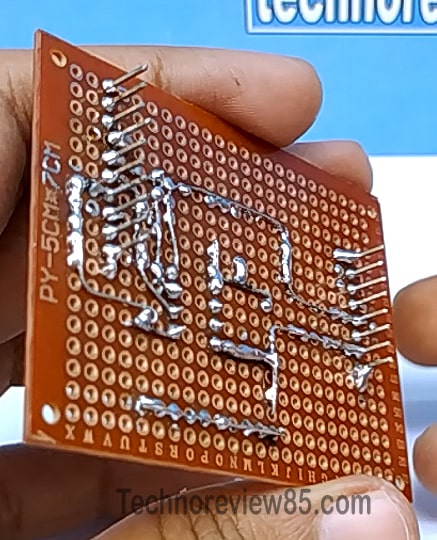
We have to connect the Attiny to Uno board. You can make a temporary set-up on a breadboard like the below picture.
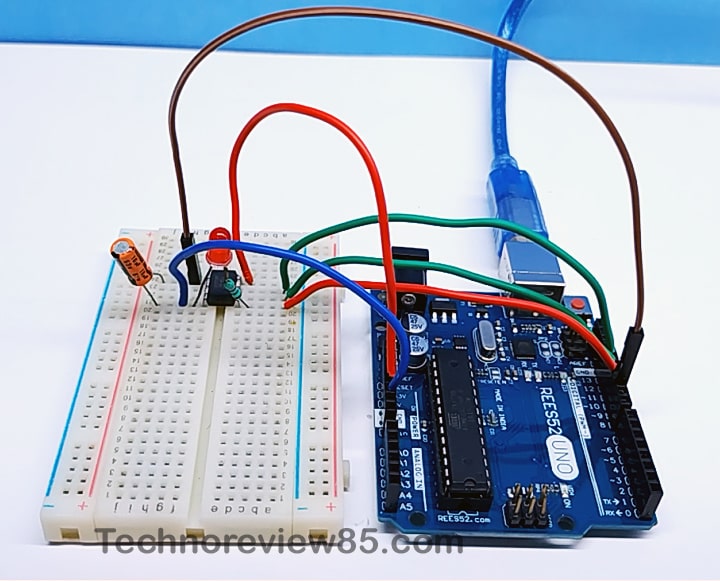
but I made a shield for Arduino which is better than this temporary breadboard setup. In the breadboard setup, you may face some problems for lose connection so I will recommend making this shield for the best result.
You need to make a connection
Male header pins
8pin ic base (no need for breadboard setup)
10mfd capacitor
220E resistor& Led
Doted board
& Arduino Uno
Connection Diagram
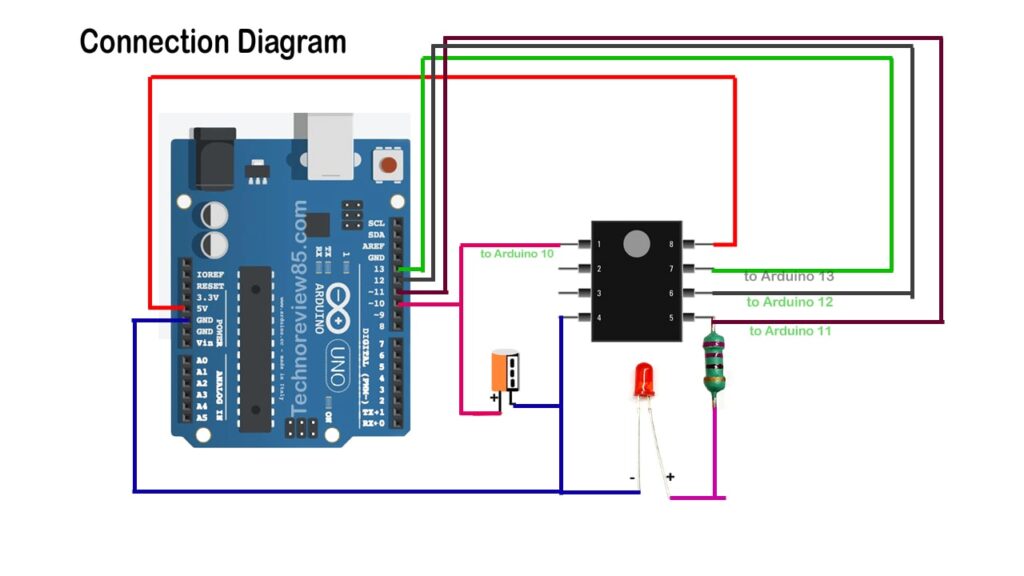
Connect Arduino 5v to attiny pin – 8
Arduino pin 11 to attiny pin – 5
Arduino pin 12 to attiny pin – 6
Arduino pin 13 to attiny pin – 7
Arduino pin 10 to attiny pin – 1
Capacitor + to attiny pin 1 & negative to attiny pin 4
Led connected to pin5 via 220 e resistor.
Programming setup on Arduino IDE
Open Arduino ide – go to file preferences- now paste this additional board manager URL
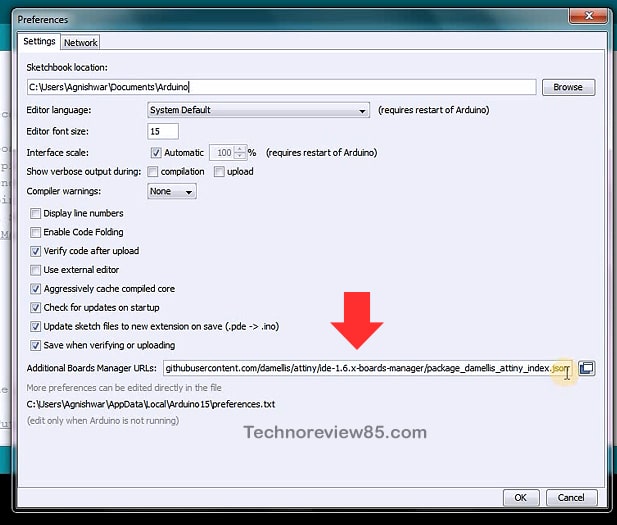
https://raw.githubusercontent.com/damellis/attiny/ide-1.6.x-boards-manager/package_damellis_attiny_index.json
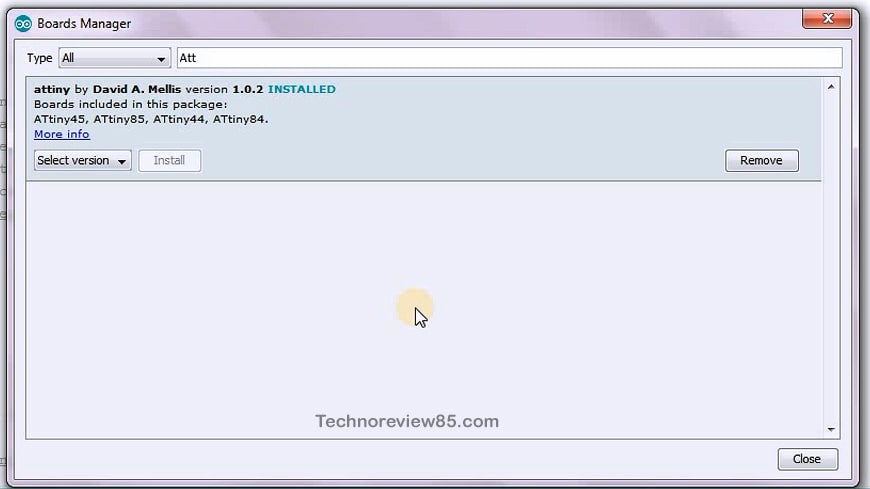
Now go to tools- board manager- search for Attiny – install Attiny board support.
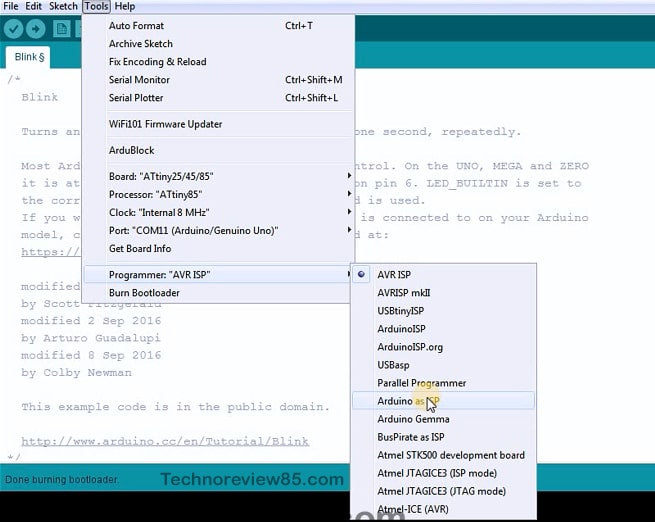
Go to tools- board- chose board Attiny 25/45/85
Select professor Attiny 85
Select clock – Internal 8MHz
Chose programmer – Arduino as Isp
Now connect the Arduino & Attiny85
Select your proper com port.
Go to tools & burn bootloader.
For the first time you need to burn a boot loader. Not every time.
Now Attiny85 Is ready for programming.
Uploading the sample LED blink code
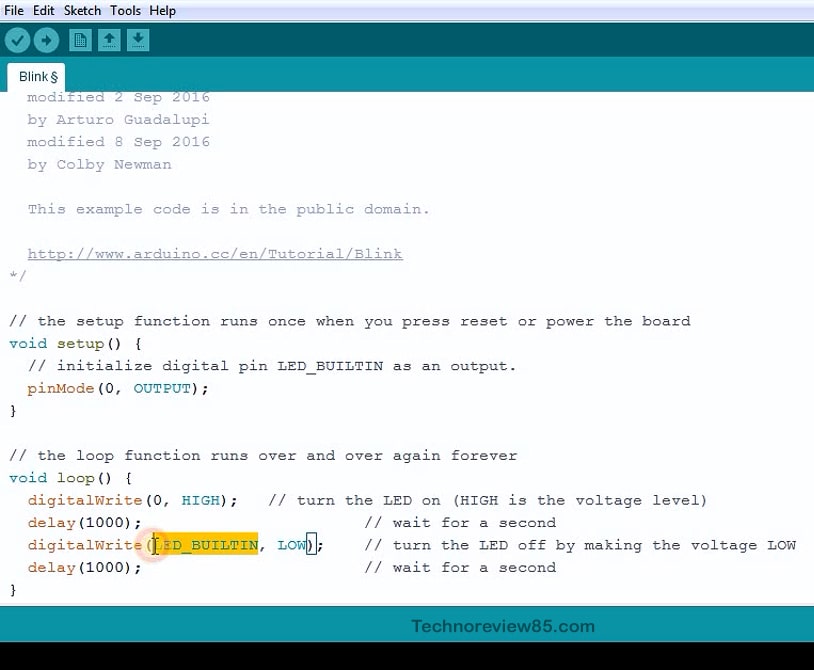
Go to file-example-basic-blink.
It is arduino Bulletin Led blink code.
I have to change built-in to pin 0.
Our led is connected to pin 5 which is working as pin 0 in arduino Ide.
Go to tools- chose board Attiny is selected, chose processor, clock,
Programmer Arduino as Isp.
Select your com port.
Now upload.
Now it is done, successfully uploaded code To Attiny 85.