
It is a guide for set up & upload code to M5stick C module using Arduino IDE.
1. Download Arduino IDE
Download & install Arduino IDE on your pc.
2. Install esp 32 board manager in Arduino IDE
The M5stick c is ESp32 chip powered so we have to install ESp32 board package.
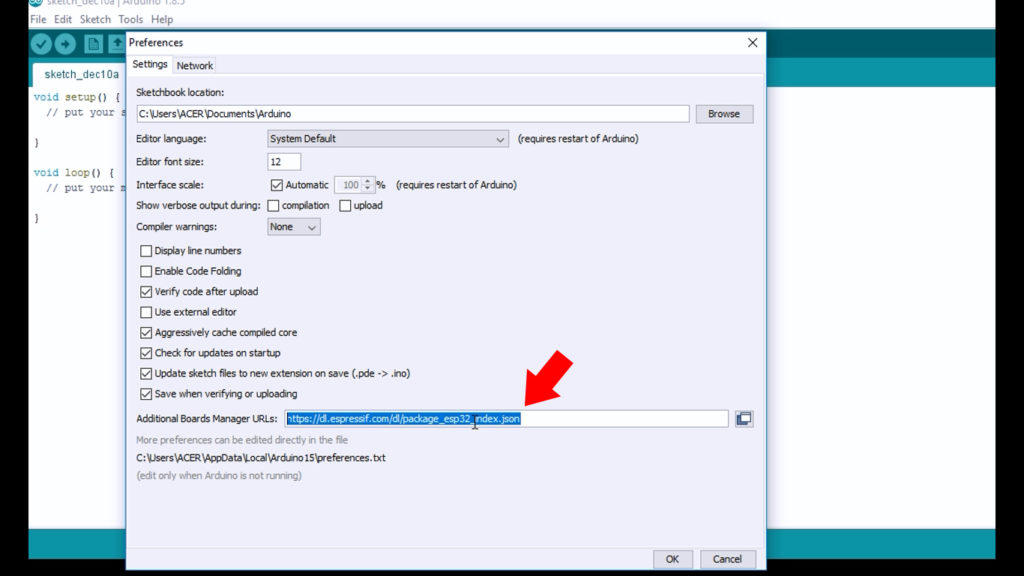
go to – file preferences -setting paste this URL to additional board manager URL – https://dl.espressif.com/dl/package_esp32_index.json
Now go to tools > board > Boards Managers
search for esp 32 & install the esp 32 package.

3. Install M5stic c library
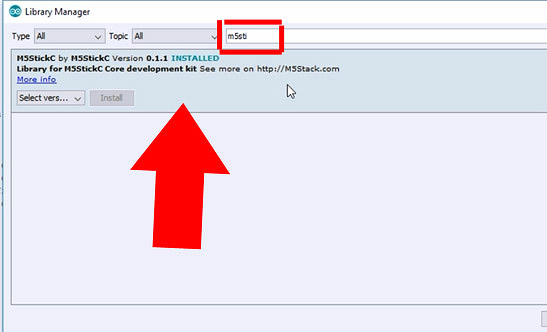
Now go to sketch -Include Library -manage library
now here search for m5 stick c
install m5stack library.
4. Driver installation for M5stick C
M5StickC uses the FTDI’s USB to Serial converter chip.
It is usually no need to install a driver.
if you are facing any problem for Driver or if you M5stick c device is not detected then you can download driver & install it manually
Download FTDI to USB driver from here
5. Select board
Select board “M5Stick-C”
Upload speed – 1500000
Select your Com port
6. Sample code uploading
Go to file – Example- M5stickC-Choose any sample code & upload it
LED blink code for M5stick C
Connect LED (-) pin to GND & LED (+) pin to M5stick c G26 & upload code to M5stick c
#include <M5StickC.h>

/***
 * LED Blinking

const int ledPin = 26;
void setup() {
  // setup pin 5 as a digital output pin
  pinMode (ledPin, OUTPUT);
}
void loop() {
  digitalWrite (ledPin, HIGH);  // turn on the LED
  delay(500); // wait for half a second or 500 milliseconds
  digitalWrite (ledPin, LOW); // turn off the LED
  delay(500); // wait for half a second or 500 milliseconds
m5.update();
}